Environments
Each application on the Divio Cloud Platform can have multiple environments. By default, all applications include a Test and Live environment. Each environment is entirely distinct and independent and has its environment variables, logs, containers, databases, media storage, and other services. All environments in an application use the same Git repository, but each can use a different Git branch.
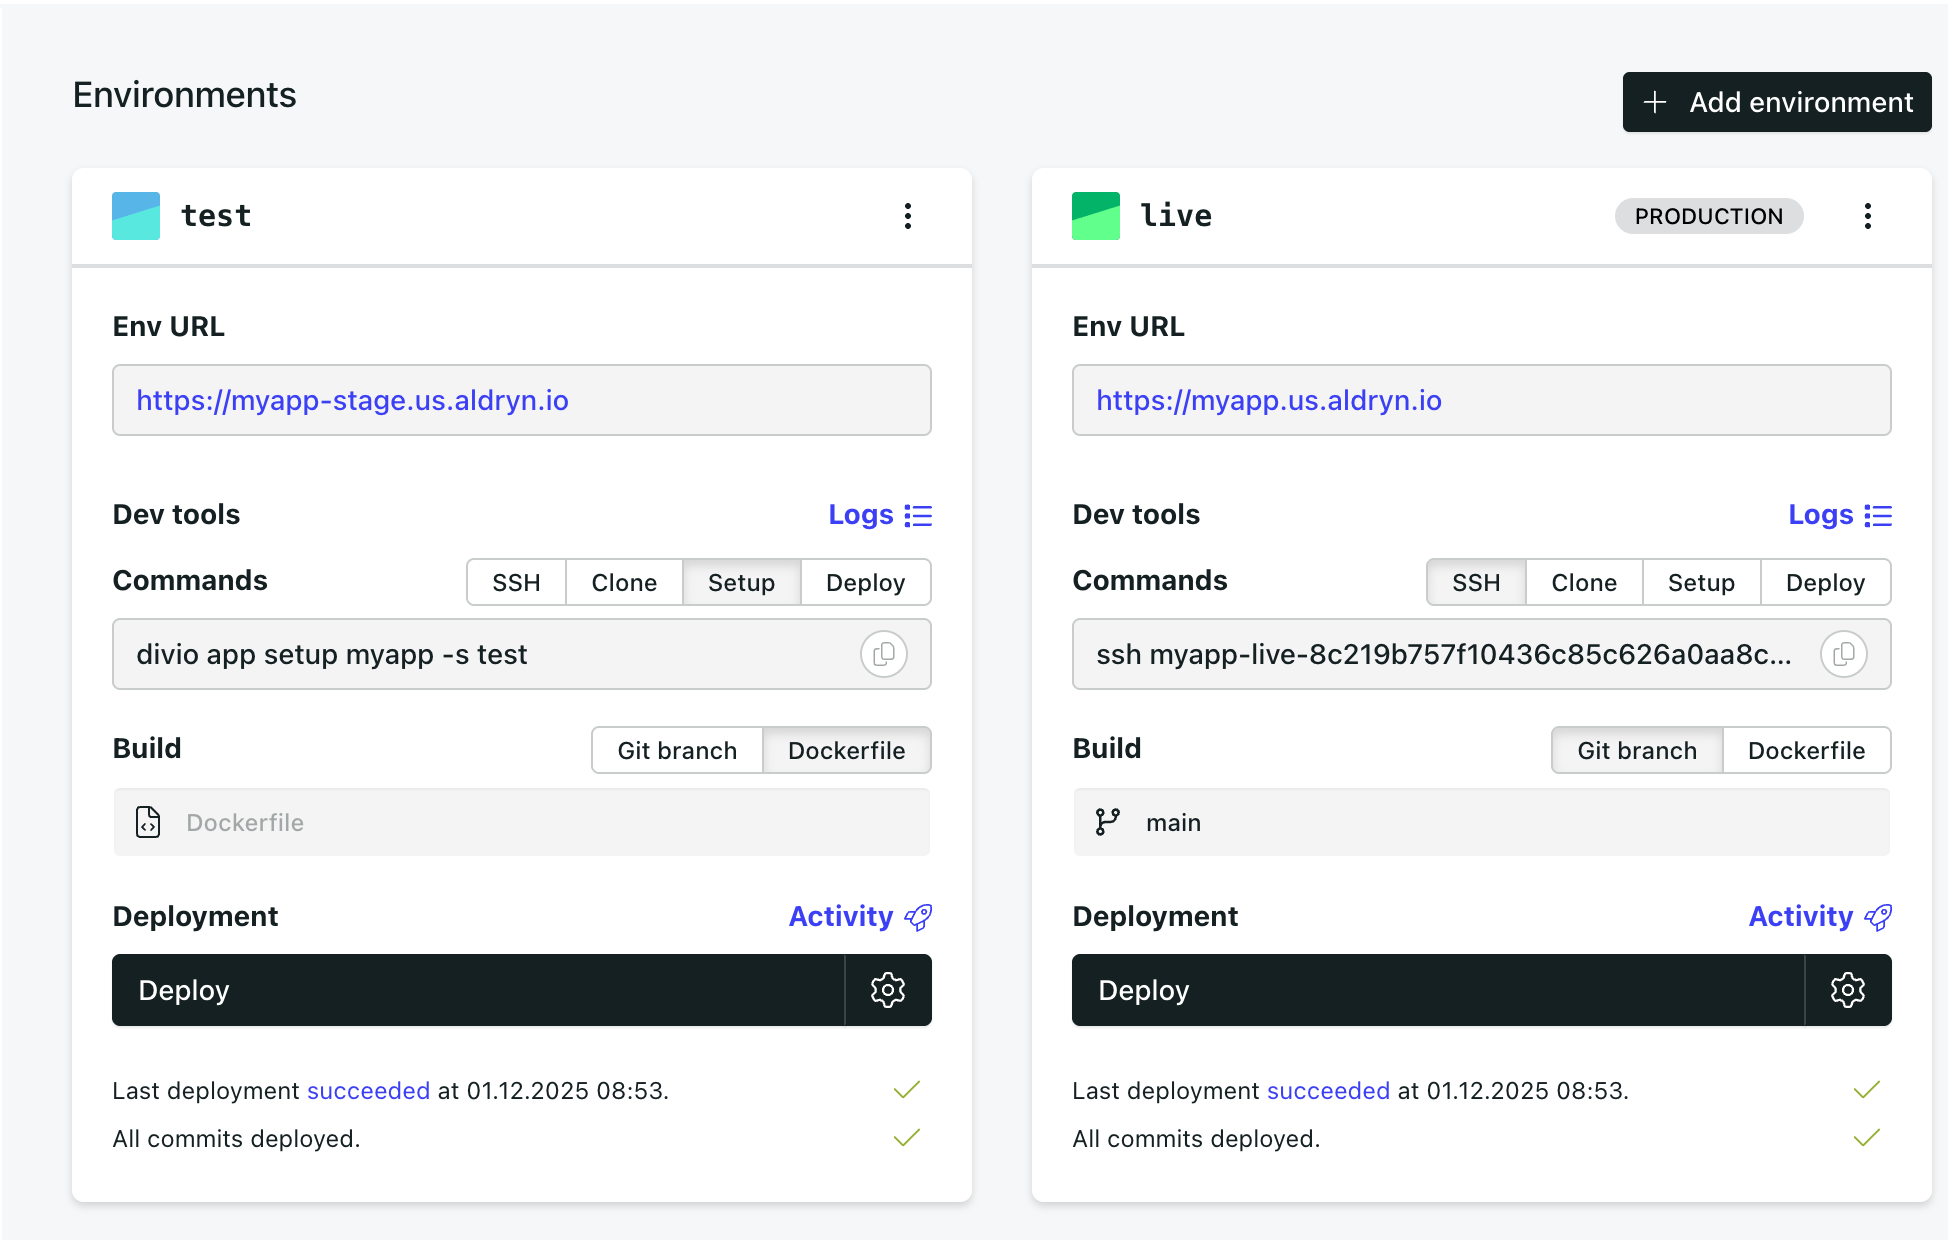
The view provides options for configuring environments (for example, setting Git branches), access to useful development commands, controls for deployment and other actions, and links to deployment and runtime logs.
Application environments
Each Divio application includes two environments for the application by default.
The two environments are created in Docker containers from the same images.
- Test, running on our Cloud servers
- Live, running on our Cloud servers
In our recommended workflow, development is done locally before being deployed to Test and finally to Live.
It is also possible to set up multiple cloud environments for an application. For example, create environments for Development, Testing, QA, Production and more.
General features
Env URL
Provides an endpoint to access the application on the web. Every environment gets a unique URL domain. The domain becomes enabled once the environment has been successfully deployed. If it becomes unavailable after some time, for example, due to inactivity, deploy the environment again. You can also manually stop the environment by selecting the "..." menu and click on Stop environment.
These domains are publicly accessible, can be crawled by bots, and need to be protected on your end. This primarily concerns the test environment, which you may want to secure from public access by either adding HTTP Basic Authentication or through the language/framework you are using. If the live domain gets indexed by search engines have a closer look at our search engines guide.
Dev tools
The dev tools allow you to interact with the container of your environment. It provides helpful commands to setup that specific environment on your local computer, access logs or SSH into the specific environment. You need to have the environment deployed for some actions to work:
- SSH: Connect to the environment's container via SSH and execute commands. This is helpful for running migrations manually, accessing local logs, or debugging issues. Make sure to add your SSH public key to your account settings.
- Clone: Git clones the environment's repository to your local computer. This command will only clone the repository using the specified branch of the environment.
- Setup: Setup the environment on your local computer via the Divio CLI. The command will clone the repository, install the dependencies and set up the environment on your local computer.
- Deploy: Run this command on your local computer to deploy that specific environment or use it for CI/CD pipelines.
You can also quickly access the Logs for that environment. Read more about logs in our feature section.
Git branch
Set the git branch the environment should use to deploy. By default, the Test and Live environment uses main if not specified differently. You can change the branch to any other branch in your repository. Just make sure it exists and is up-to-date. Further configuration, such as using an external Git provider, can be found in the Repository section of your application.
Dockerfile
Set the Dockerfile that the environment should use when building its container image. By default, the Test and Live environments use the root Dockerfile. If your repository provides additional Dockerfiles, such as Dockerfile.test or Dockerfile.live, you can provide the appropriate one directly in the Control Panel.
The environment will always build its image from the exact Dockerfile name you set. Make sure the file exists in your repository and includes all required configuration for that environment.
Deployment
When an application environment is deployed with new code, the site will switch from the old deployed version to the new one without skipping a beat. There is no downtime while a build takes place. As soon as the newly deployed containers are available to serve the site, they will take over the application-serving duties. Both containers run simultaneously during that time, and you may see a spike from within the Metrics view during that short time.
Each deployment includes multiple self-tests and health checks, all of which must pass for it to be declared successful. Only then will the new deployment be put into production. If any test fails, the deployment will fail, but the site will keep running as if nothing had changed.
The deployment process allows for some configuration when clicking on the cogs icon:
- Content: Choose to deploy the content of another environment to this one. This will override the database, media files and other service instance data of the current environment with the selected one, helping to keep the content in sync between environments. This is destructive and cannot be reverted, make sure to create a backup beforehand.
- Build: The normal deployment behaviour is to build the image if code changes are applied. If there are no changes, the previous build image will be used. You can force a new build by selecting Force rebuild. Similarly, you can choose Reuse image to trigger the deployment process without building a new image, even if there are code changes.
Read more about the build process to understand what happens during a deployment.
You can see the previous deployments in the deployments view. You also have direct access to the Activity from there to see what has changed recently.
Have a closer look at the deployment process to understand what the Divio Cloud Platform performs during a deployment.
Status messages
The status messages provide information about the current state of the environment. It will show if the environment is running or stopped or if there are any issues with the deployment. The following message types are available:
- Server not deployed yet: The server is not deployed yet, certain actions are unavailable until the server is deployed.
- Last deployment succeeded at: The previous deployment was successful at the given time.
- Last deployment failed at: The previous deployment failed, check the logs for more information.
- All commits deployed: All commits of the provided branch are deployed to the environment.
- X undeployed commits: There are X commits that are not deployed to the environment.
- X undeployed commits and unapplied changes: There are X commits that are not deployed and application settings, such as a branch change, modified environment variables or modified addons are not applied yet.
The production environment
The Live environment, unlike the other environments:
- never sleeps (the others will shut down their containers after an idle period to save resources)
- can use multiple containers if specified in the application subscription (the others use only one container)
- can be wired up to the user's domains
Adding and removing environments
Depending on the subscription plan, an application may or may not have the ability to add additional environments. Currently, only applications with Business subscriptions can add new environments.
The Add environment button allows you to create additional environments. For example, you might create a QA environment for in-depth testing of new functionality or explore functionality development in a new codebase branch before merging into the main branch.
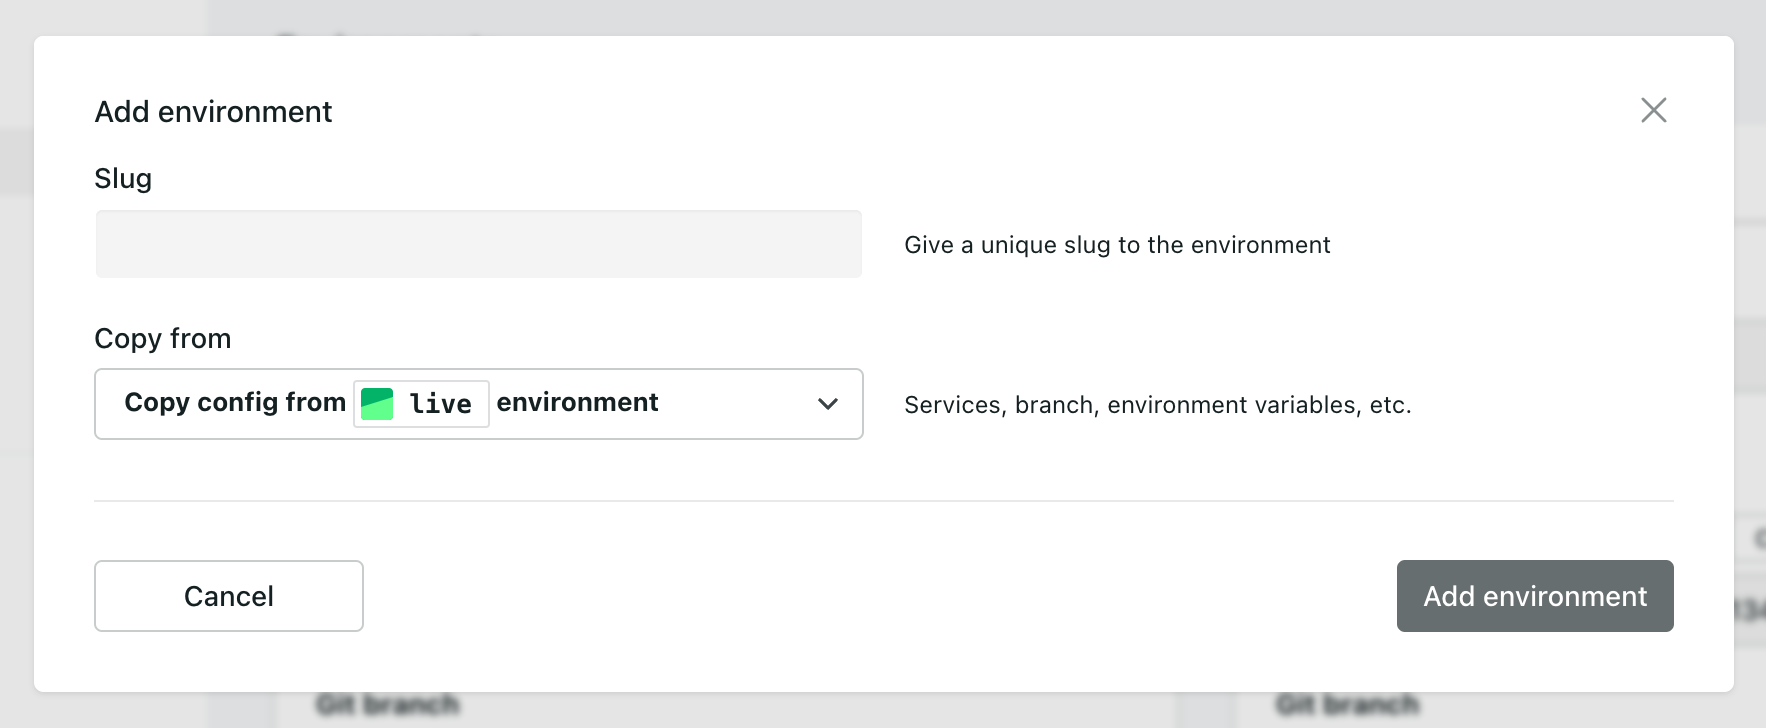
Each new environment can be based on an existing one or set up from scratch with a custom branch.
Additional environments can be removed from the "..." menu on the top right of the environment card. Please note that removing an environment will also remove all data associated with it, including the database and media files. The Test and Live environments cannot be removed.
Default application conditions
Some of these conditions may be readily altered according your needs, for example the DEBUG setting. See also How to run a local application in live configuration.
| Local | Test | Live | |
|---|---|---|---|
STAGE environment variable | n/a | test | live |
DEBUG environment variable | n/a | True | False |
| static files served by | local server | uWSGI | |
| media files served by | local server | our Cloud S3 service | |
| database runs in | a local container | our Cloud database cluster | |
| number of application containers | one | one | according to subscription |
| application container sleeps | n/a | after 15 minutes' activity | never |