How to manually upgrade PostgreSQL
Manual upgrade steps
The following instructions show how to upgrade your PostgreSQL service instances manually without downtime. These steps must be applied to each environment where the upgrade is required. Please carefully review the "Risks" section below before proceeding!
The example below demonstrates an upgrade from PostgreSQL 9.6 to PostgreSQL 13. These steps apply to any PostgreSQL version. Be sure to replace 9.6 with your current/old version and 13 with your target/new version.
- Check the prefix of the current installation. This will be
DEFAULTif it has not been manually changed, but can be anything. In this example, we will refer to it asDEFAULT.
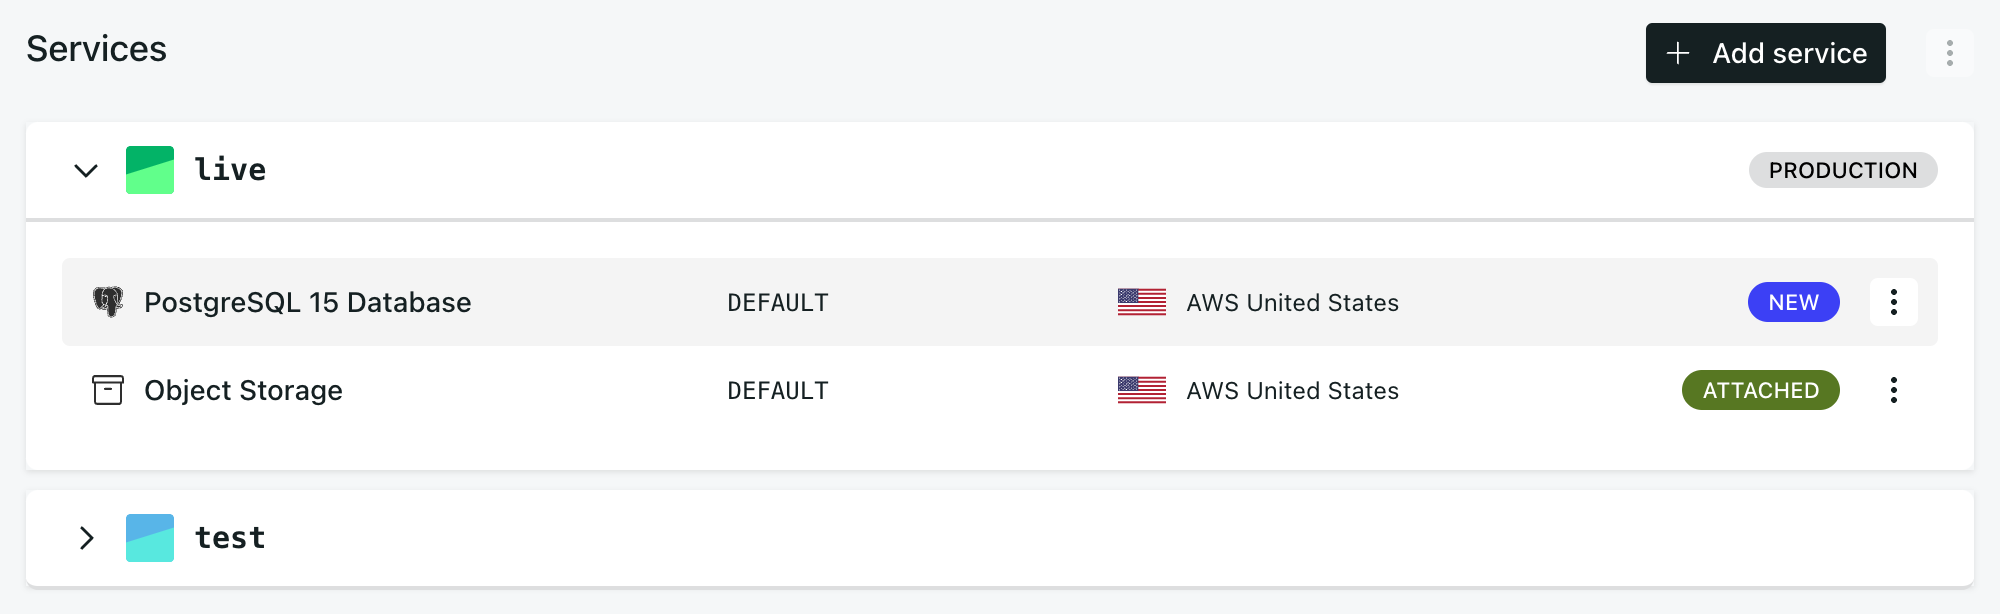
- Add the PostgreSQL service for the new version to your environment. Assign this the default prefix
NEW.
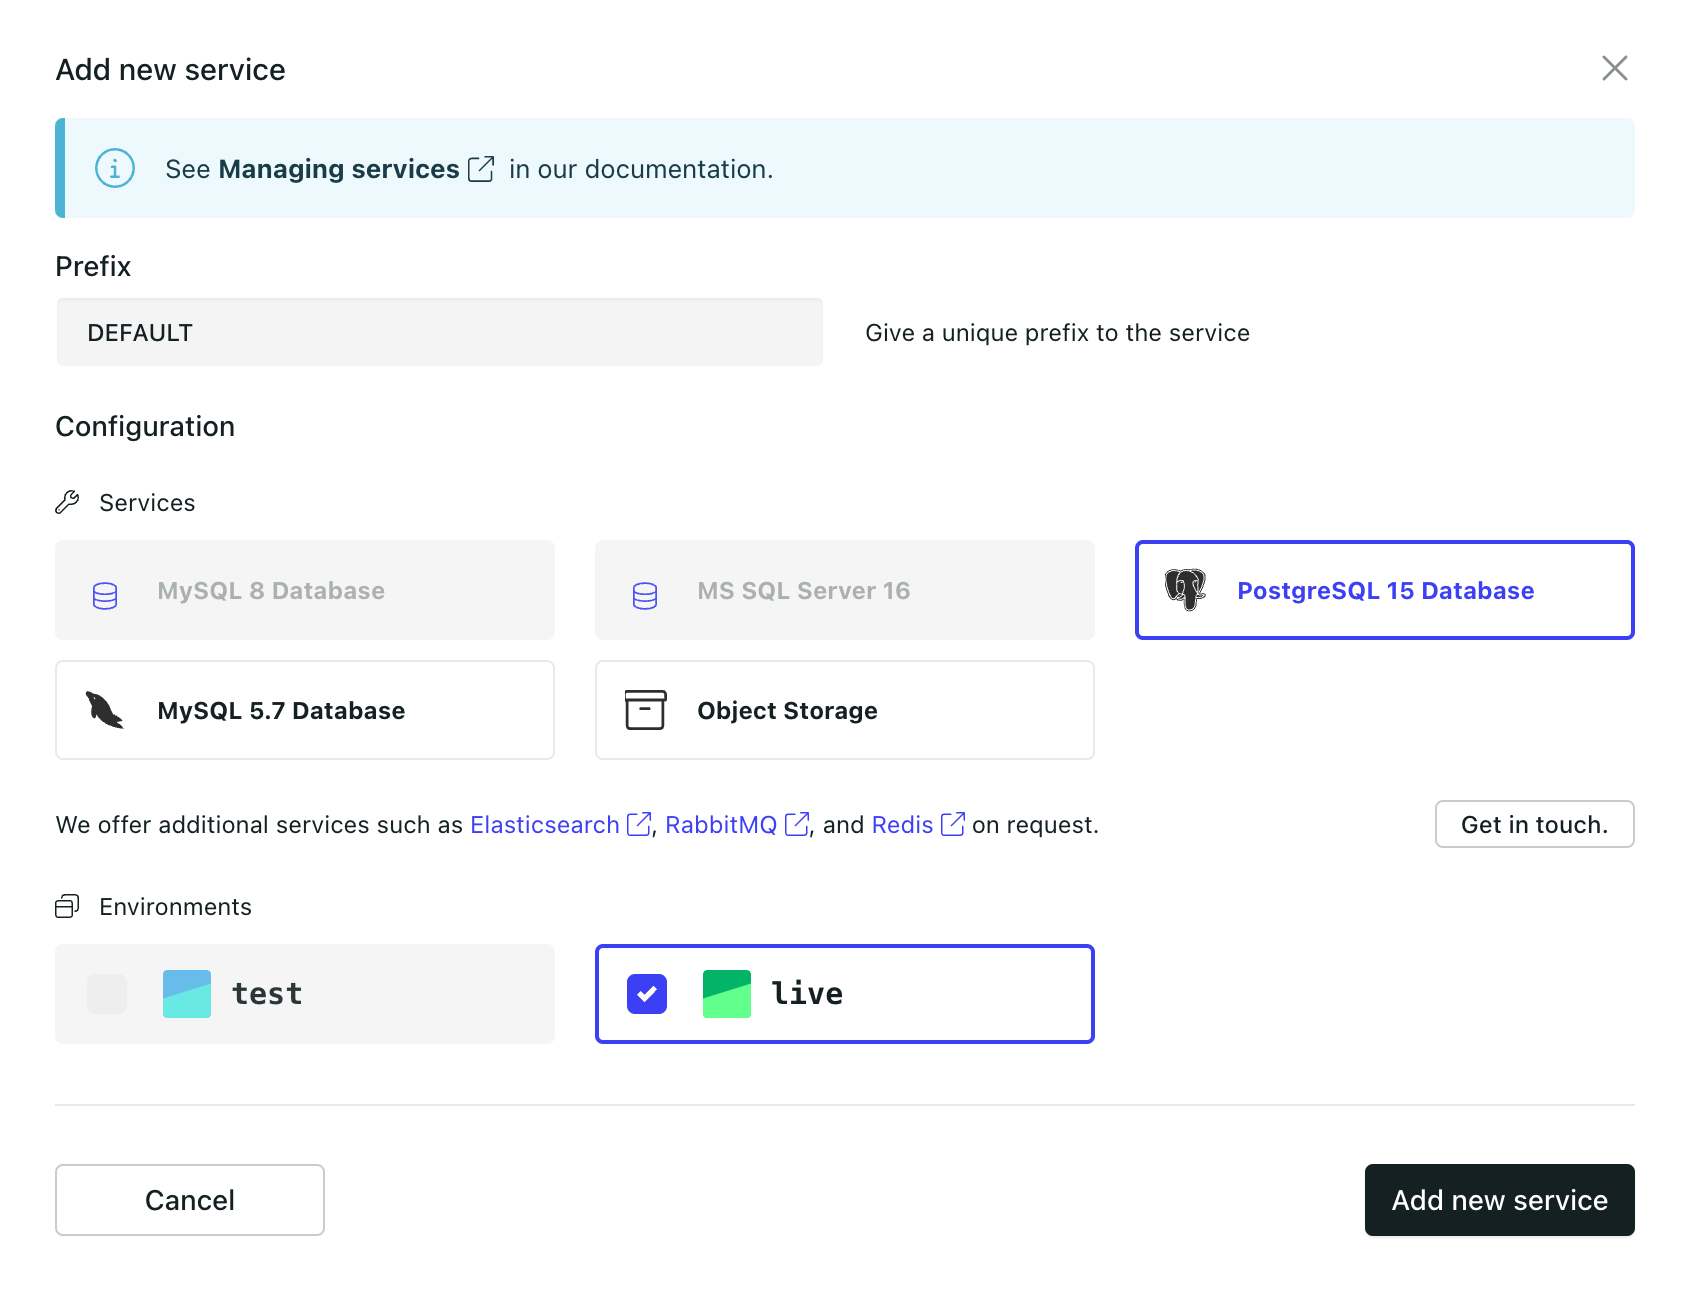
- Provision the new PosgreSQL service.
- Repeat steps 1-3 for each environment.
At this point, the environment is still running on the old version of the database, but the service for the new version is deployed and ready to receive data. The following steps will copy the data from the existing database to the new version.
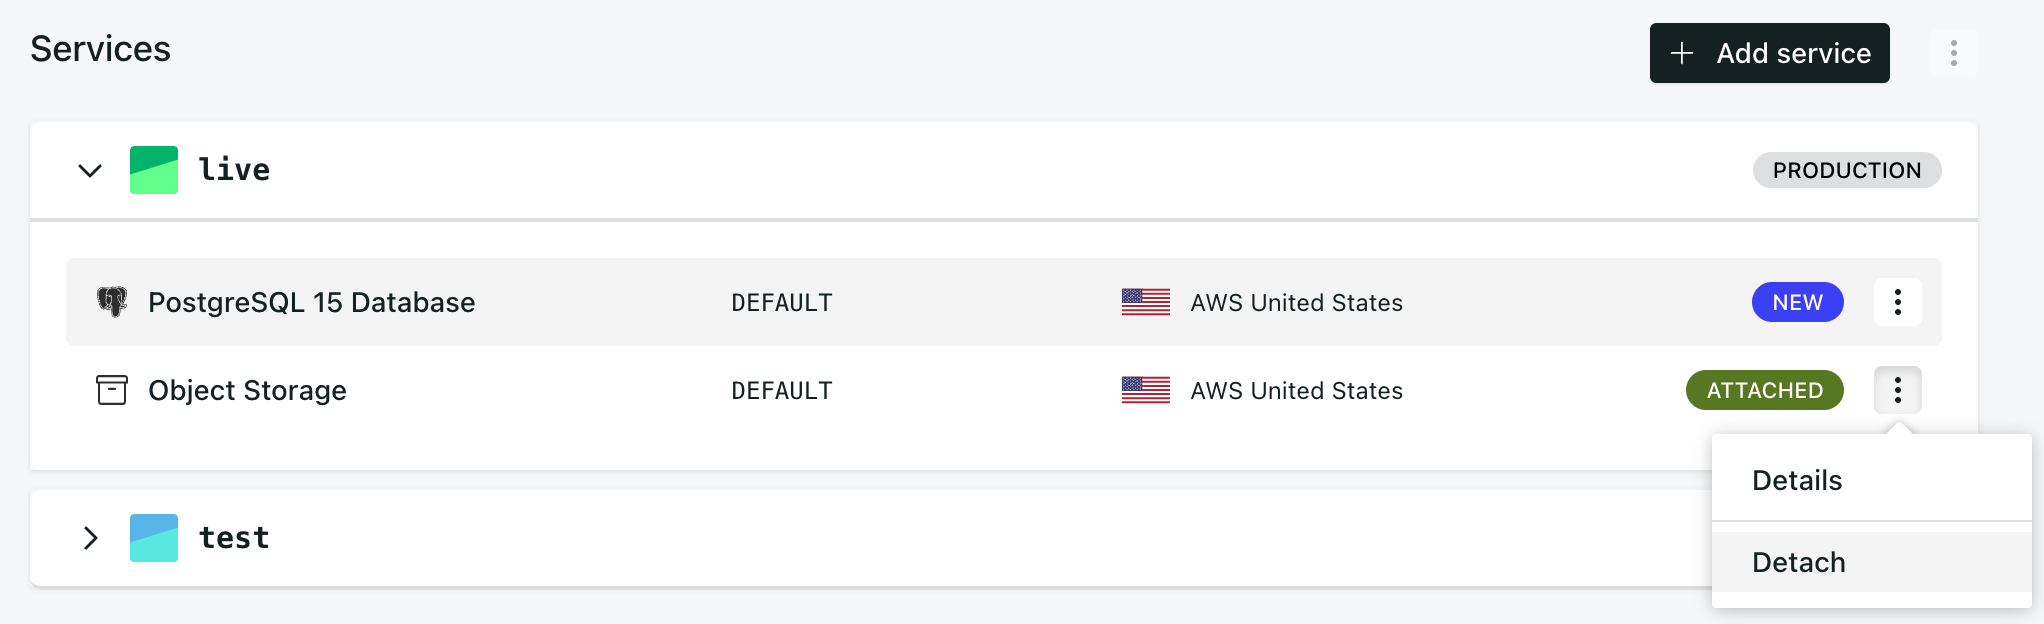
When a service shows as Pending attachment, it means it is functional but not yet connected to the application. Only services in the Attached and Pending detachment states are visible to the app and thus usable. The new version will be used (Attached) after you deploy your changes in step 11.
For more information on how and when services are provisioned and attached, please see the Services documentation.
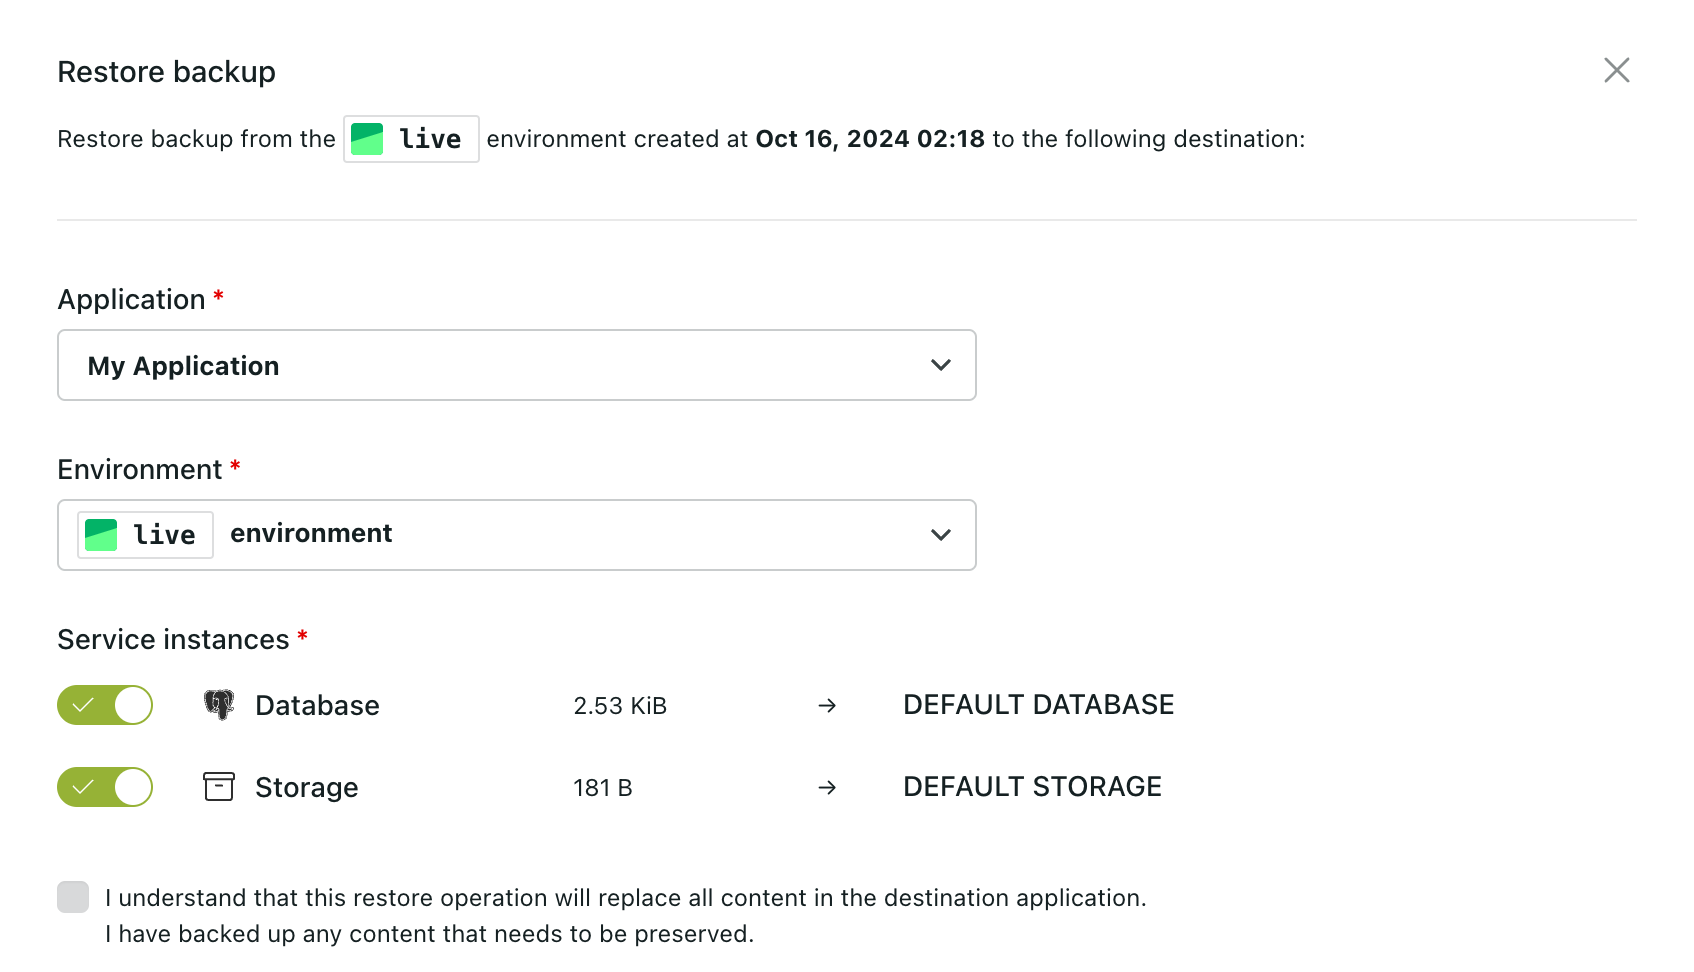
- Create a backup for the
DEFAULTdatabase service. - (Optional) Prepare a backup download and back this up somewhere. This step is not required from a migration perspective but may be needed to comply with local policies or just useful as a pre-migration snapshot later.
- Once the backup is complete, restore it to the
NEWservice.
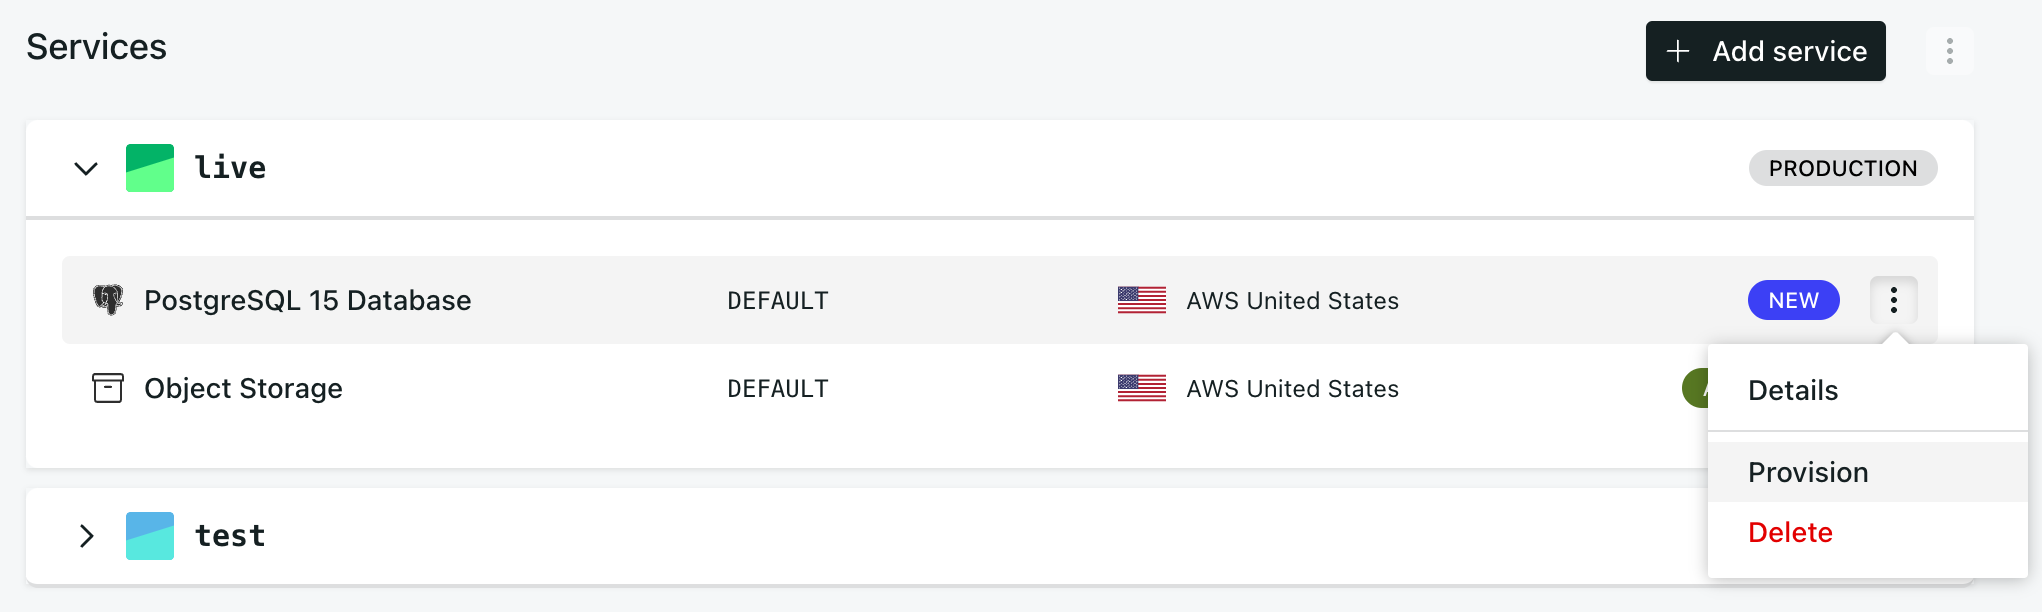
- Rename the prefix for the old database version from
DEFAULTtoOLD. - Detach the
OLDPostgreSQL service. It should now be inPending detachmentstate.
- Rename the prefix for the new database version from
NEWtoDEFAULT(or whatever prefix your original PostgreSQL service had before the upgrade). - Deploy the environment. Upon success, you should see the new service as
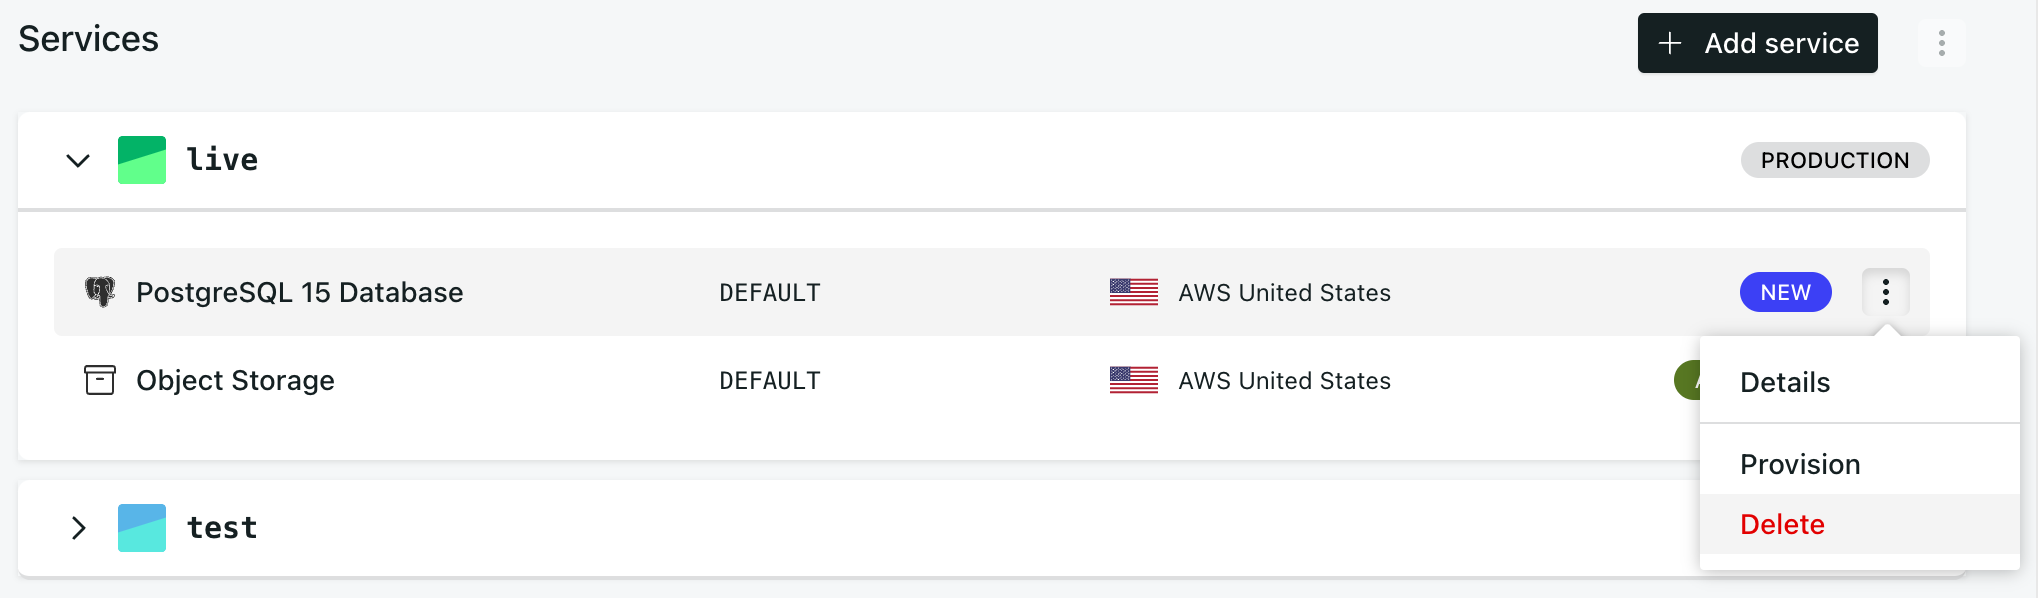
Attachedand the old service asDetached. Your application is now using the new database. - Delete the
OLDPostgreSQL service.
- Repeat steps 5-11 for each environment.
Your environment is now using the new PostgreSQL service for the upgraded version.
To run the application locally with the upgraded database, a few extra steps are required:
- Edit your
docker-compose.ymland change the tag of the PostgreSQL image. For example, frompostgres:13.5-alpinetopostgres:18-alpine. See the official DockerHub postgres image for a list of available tags. - Run
docker compose down -vto stop the containers and remove the volumes. - Run
divio app pull db <environment>to pull the updated database from the environment you want locally. - Run
docker compose upto bring everything up again.
Risks
Critical: Risk of Data Loss
This migration is not atomic. Any writes to the source database that occur after the backup is taken in Step 5 and before deployment is completed in Step 11 will be permanently lost.
To avoid data loss:
- For high-traffic applications, place the site in maintenance mode or disable write access before starting Step 5.
- For low-traffic or CMS-based applications, ensure that no users or administrators make changes during the migration window.
Do not proceed unless you can guarantee a zero-write environment throughout the migration, or you have put a maintenance page in place.
Upgrading PostgreSQL 15 to PostgreSQL 18
There are no known incompatibilities for this upgrade. However, we encourage you to look at the PostgreSQL changelog, and especially the following changes:
-
Authentication: PostgreSQL 18 further restricts the use of
md5password authentication in favour ofscram-sha-256. Before upgrading, verify that your application and database client libraries support SCRAM authentication, such aspsycopg2or the Node.jspgmodule. -
Collation and index integrity: PostgreSQL 18 changes how full-text search and
pg_trgminteract with non-libccollation providers. If your database uses affected text-based indexes, you may need to rebuild them withREINDEXafter the upgrade to avoid index corruption. -
Generated columns: In PostgreSQL 18,
VIRTUALis now the default for generated columns. If your schema relies onSTOREDgenerated columns for performance or behaviour, declare them explicitly.
Upgrading PostgreSQL 13 to PostgreSQL 15
Known incompatibility: libpq < 10
PostgreSQL 14 changed the default password encryption server parameter from md5 to scram-sha-256. This new authentication encryption is supported in libpq version 10 and higher. Postgres drivers such as psycopg2 (Python), pg (Ruby), and pdo_pgsql (PHP PDO extension) are known to rely on libpq behind the scenes.
All divio base images (divio/base:<tag>) have been updated to use a recent libpq binary. If your application uses a divio/base image (check the FROM instruction in your Dockerfile), simply rebuilding your application is enough to guarantee SCRAM support.
Checking your version of libpq
To check your version of libpq:
-
Go to your Application’s Environment view
-
Copy the SSH command and execute it in a terminal to connect to your application
-
Run the following command inside the shell:
find / -name "libpq.so.5.*" 2>/dev/nullThe output should look like:
/usr/lib/libpq.so.5.9The number
Xinlibpq.so.5.Xis the actual version oflibpq(9 in the above example). If there is no output, this means you are not using libpq. You can thus safely proceed with the migration.
Upgrading libpq
If your version of libpq is below 10, you need to take action. In general, updating your base image (FROM instruction in your Dockerfile) to a more recent tag and/or installing a newer postgreSQL client should fix the issue.
On linux, libpq is often installed through the postgresql client:
- Using
apt→apt install postgresql-client-15 - Using
apk→apk add postgresql15-client
If you need support, don’t hesitate to reach us.
Hack: temporarily patch an image
The following outlines a highly temporary and unconventional workaround. Only proceed if no other options are available and you fully understand each step in this procedure!
In some cases, the base image is too old to provide a newer libpq from the default package manager, and updating the base image requires too many changes that you cannot handle right now. As a last resort and temporary measure, a possibility is to copy the libpq binary from a more recent base image inside your image. The only requirement is for the two images to share the same OS (e.g. linux) and architecture (e.g. x86_64).
-
Find the path
P_OLDto thelibpqbinary inside your image (see “check your version” above). Note down the directoryD_OLDin which the binary resides. -
Find the path
P_NEWto thelibpqbinary inside a more recent image. Note down the filenameF_NEWof the binary. It should matchlibpq.so.5.XX, withXXthe new version. -
Add the following to your
Dockerfile:FROM some-image:<old-libpq-tag># ...## Copy the new binary inside the image# some-image:new-tag should contain a more recent libpq versionCOPY --from some-image:<new-libpq-tag> <P_NEW> <D_OLD>/<F_NEW># Update the link so it points to the new versionRUN ln -sf <D_OLD>/<F_NEW> $(find / -name libpq.so.5 | head -1)The
COPYadds the new binary to the image, and theRUNupdates the symbolic link to the library, thus activating the new version in place of the old one.
Other incompatibilities
For more information about possible incompatibilities, see: